Supplies:
unfinished wood frame (I purchased mine for $1 at Michaels)
(1) 12" by 12" piece of patterned card stock (for frame)
(1) piece of card stock for the flowers (solid or print)
cutting mat and x-acto knife
ink pad (i used a copper/gold color)
circle punches, circle cutter or a plain old pair of scissors
sanding block
decoupage glue (i.e. Mod Podge)
3 bead or button (for flower centers)
hot glue gun
clear polyurethane top coat (spray can)
Instructions:
pick out your patterned paper. Please note the pattern shown. The opposite side is blue pods which you will see in the tutorial. *I prefer to use a thick card stock to help prevent bubbling.
 Spread a thin layer of decoupage glue on the front side of the unfinished frame. Place the right side of the frame (with glue) onto the wrong side of the paper and press firmly. You can also turn over and rub lightly to be sure to remove any bubbles. Allow glue to set.
 Place frame on cutting board and use an x-acto knife to cut around the frame. Don't worry about any small tears, you will be sanding the edges next and imperfections add character to the distressed edges!
  Sand the outside and inside edges of the frame
 it will look like this:
 Now use an ink pad to go along the sanded edges. You are just going along the edge, not the entire depth of the frame. I use the fancy art technique of dipping a finger in ink and rubbing it on the frame to get the inside corners.
 Now it should look kind of like this:
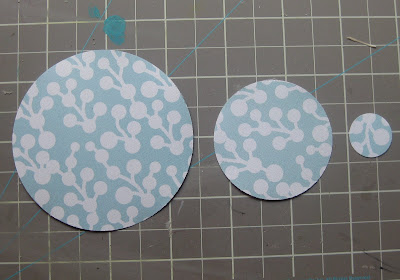
 Now it is time for your flowers. You will want three "nesting" circles. My largest circle has a 3" diameter. I used a Marvy Uchida circle punches but you could use and circle cutter or even a compass or trace some household objects.
I normally use solid card stock for the flowers but I really like the print on the opposite side of the card stock so I decided to use the excess as my flowers. You will cut out three sets of circles. You need to use a thick card stock to really get a good shape to your flower when "squishing" it
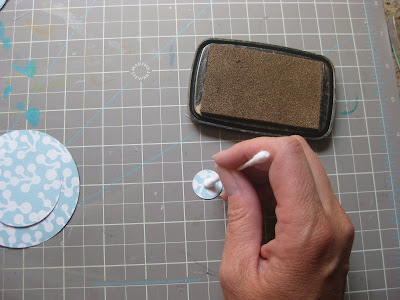
 Before squishing, I use a q-tip to color the center of the smallest circle to emulate "pollen"
 Now for the fun part, squishing!I layer each flower then put my thumb in the center and "squish" the flower around my thumb. This is not a science and don't be too critical, it is adorable and does not need to be asymmetrical!
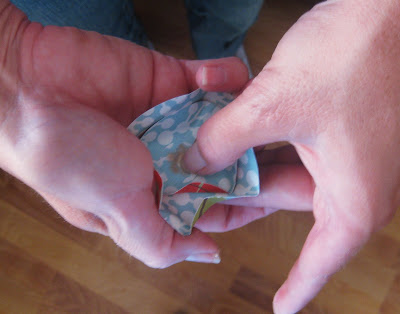 Now I ink the edges of each circle. I like to "squish" before I ink so the ink catches in some of the folds and wrinkles!Now you can assemble all three layers of each flower with a small dot of hot glue in the center of each layer.
 Then in the center you can hot glue a bead or button. Once done, I like to figure out the placement of each flower. Sometimes I do a cluster, sometimes they all go on top and sometimes on one side. Be creative and see what fit with the design.
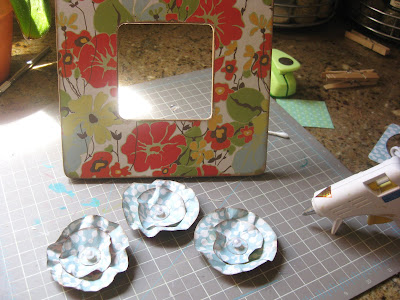 Once your flowers are affixed with hot glue you can seal and protect your beautiful frame with two coats of polyurathane. Put a picture or a quote in the center and it is ready to go!


 Another thing I am


 Broadway


