Monday, October 19, 2009

Halloween Tutorial- Bat Chandelier

When I was flipping through my Pottery Barn Kids catalog, I saw this great bat chandelier but there was no way I was paying that much for a seasonal decoration.....I am just funny like that.

It looked easy enough to reconstruct so that is what I did.

Supplies needed:

3 embroidery hoops, various sizes
black acrylic paint
tacky glue
black embroidery thread
large hand sewing needle
black pom-poms
black cardstock or felt (stiff felt preferred)

Instructions:

First Step was taking the inside hoops and painting them black
Next I cut out about 31 bats. I used black cardstock because I can cut 4 at a time versus one at a time with felt. Since this was an experiment, I didn't want to invest too much extra time. I just created my own bat stencil/template but if you'd like to use it, just email me at debye@cberryfamily.com and I'll send it to you.

Then I tied strips of the black embroidery thread approx 9" long around the hoop eyeballing them about 2 and 1/2 to 3" apart like this: After all the strings were attached, I took tacky glue and applied a little to the ends to make it stiff and much easier to thread. Then I put a small amount on each knot (around the embroidery hoop) to make it more secure.

To add the bats and pom poms, I threaded each strand (one at a time) on a needle and then I strung the bat and two pom poms. I tied a thick knot at the bottom so they wouldn't slide off over time and trimmed any excess. You can really play with the length of each strand to get the effect you want.


For the top and bottom tiers I used the pattern above, for the middle tier I did an alternating pattern of one bat and on pom pom with the other stand being two pom poms.
Once all the tiers were finished, I attached them with the embroidery thread and added glue to each knot again for extra security. Viola, your own bat chandelier for under $10!

Thursday, September 10, 2009

Too cool for his own good

My almost 6 year-old is a naturally cool kid. He can throw on some of the strangest clothing combos and totally pull it off! Yesterday he decided blue hair would be even cooler and he achieved this with his older brothers shower gel .....ugghhhh

and P.S. whoever taught Chase to Vogue is in BIG trouble

Friday, August 28, 2009

Flower Frame Tutorial

This is one of my favorite quick & fun projects to make. I have had so many requests for the tutorial that I promised ages ago so I finally threw on together today! I love to give these as gifts with an inspirational quote in the center.

Supplies:

unfinished wood frame (I purchased mine for $1 at Michaels)
(1) 12" by 12" piece of patterned card stock (for frame)
(1) piece of card stock for the flowers (solid or print)
cutting mat and x-acto knife
ink pad (i used a copper/gold color)
circle punches, circle cutter or a plain old pair of scissors
sanding block
decoupage glue (i.e. Mod Podge)
3 bead or button (for flower centers)
hot glue gun
clear polyurethane top coat (spray can)
Instructions:
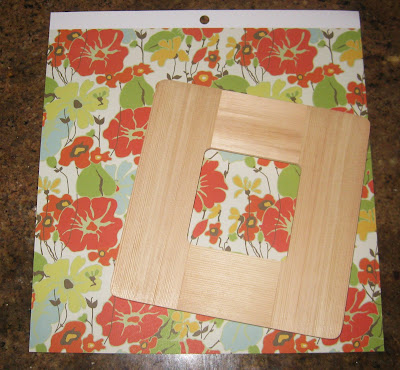
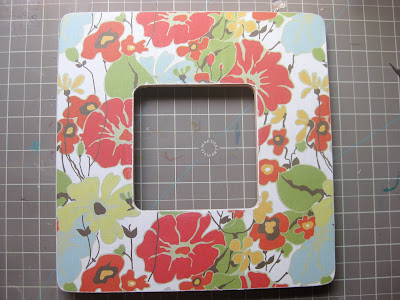
pick out your patterned paper. Please note the pattern shown. The opposite side is blue pods which you will see in the tutorial. *I prefer to use a thick card stock to help prevent bubbling.
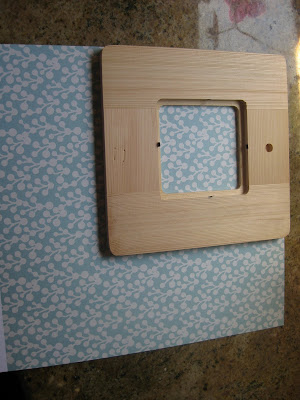
Spread a thin layer of decoupage glue on the front side of the unfinished frame. Place the right side of the frame (with glue) onto the wrong side of the paper and press firmly. You can also turn over and rub lightly to be sure to remove any bubbles. Allow glue to set.
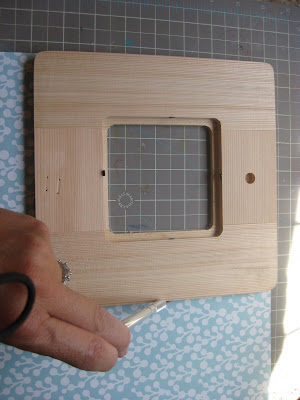
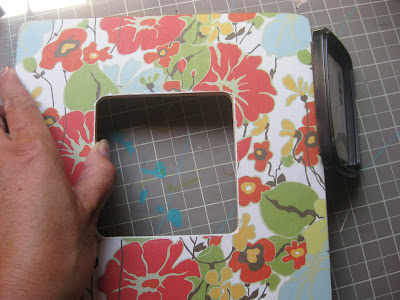
Place frame on cutting board and use an x-acto knife to cut around the frame. Don't worry about any small tears, you will be sanding the edges next and imperfections add character to the distressed edges!
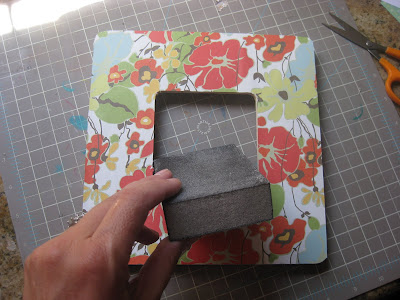
Sand the outside and inside edges of the frame
it will look like this:
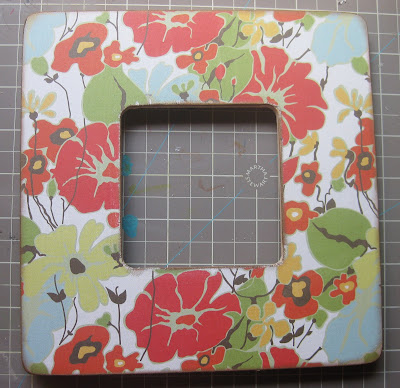
Now use an ink pad to go along the sanded edges. You are just going along the edge, not the entire depth of the frame. I use the fancy art technique of dipping a finger in ink and rubbing it on the frame to get the inside corners.
Now it should look kind of like this:
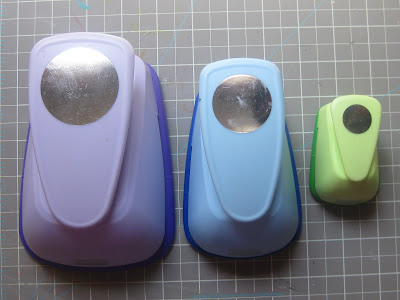
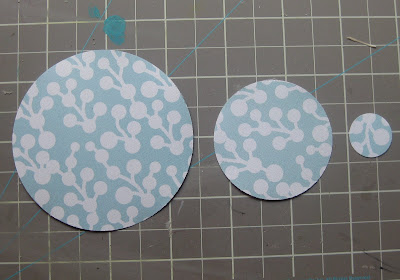
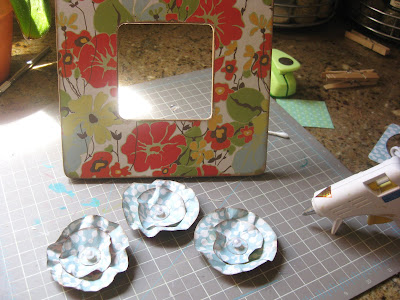
Now it is time for your flowers. You will want three "nesting" circles. My largest circle has a 3" diameter. I used a Marvy Uchida circle punches but you could use and circle cutter or even a compass or trace some household objects.
I normally use solid card stock for the flowers but I really like the print on the opposite side of the card stock so I decided to use the excess as my flowers. You will cut out three sets of circles. You need to use a thick card stock to really get a good shape to your flower when "squishing" it
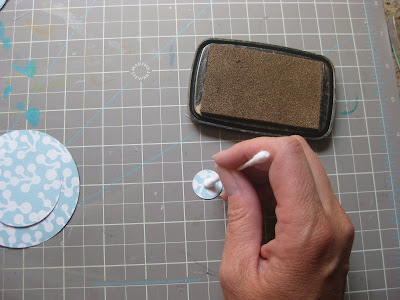
Before squishing, I use a q-tip to color the center of the smallest circle to emulate "pollen"
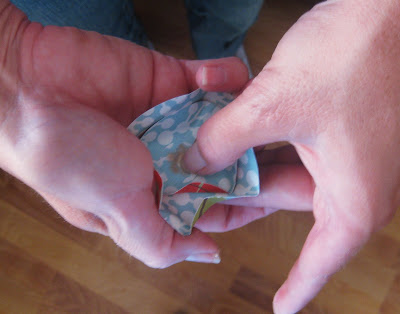
Now for the fun part, squishing!I layer each flower then put my thumb in the center and "squish" the flower around my thumb. This is not a science and don't be too critical, it is adorable and does not need to be asymmetrical!
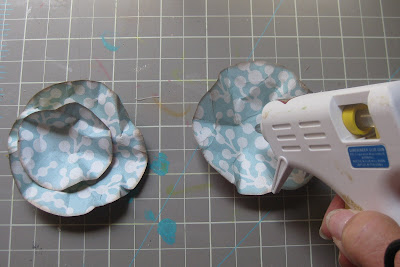
Now I ink the edges of each circle. I like to "squish" before I ink so the ink catches in some of the folds and wrinkles!Now you can assemble all three layers of each flower with a small dot of hot glue in the center of each layer.
Then in the center you can hot glue a bead or button. Once done, I like to figure out the placement of each flower. Sometimes I do a cluster, sometimes they all go on top and sometimes on one side. Be creative and see what fit with the design.
Once your flowers are affixed with hot glue you can seal and protect your beautiful frame with two coats of polyurathane. Put a picture or a quote in the center and it is ready to go!

Friday, August 21, 2009

Bridal Shower Gift......to go please


I received an invite to a bridal shower for a friends daughter and at the last minute my schedule cleared up so I am able to go! I refuse to use a registry for a bridal shower since this is a day for the bride and since I don't really know the bride, I was at a loss.

Then it came to me, a cute spunky apron for the soon to be newlywed. I have had this pattern for awhile but had not found the time to use it. This apron is simple yet has a beautiful drop waist and flutter to it. Add a few fabric flower pins and viola, it is ready to go! I hope she loves it and wears it during her first "domesticated" years so it can be a part of her fond memories.

Wednesday, August 19, 2009

Thursday Thought to Ponder

"When you come to the edge of all the light you know, and are about to step off into the darkness of the unknown, faith is knowing one of two things will happen: There will be something solid to stand on, or you will be taught how to fly."

Barbara J. Winter

Tuesday, August 18, 2009

500 Days of Summer

I have not seen this movie yet but I love the soundtrack! Plus I just adore anything with Indie darling Zooey Deshanel or her big sister. I came across this video she made and can see myself developing quite a crush on Joseph Gordon Levitt.

p.s. I really want her outfit!

Saturday, August 15, 2009

I'm Lovin' it Monday

I am doing this I'm Lovin' It Monday while laying in bed recovering from a sinus cold (pity me yet). While surfing the web from my sick bed, I came across this wonderful product that made me smile.......Happy Tape!

The ideas and uses for this product are endless, I must have them all......well, at least a lot!

Another thing I am lovin' is http://shopittome.com/. It is like your personal online shopping bargain hunter. You sign up, pick your favorite brands and sizes, how often you want your "salemail" and you get notified of what items are on sale. My favorite part is that you get a picture of each item so you can just browse through the email to see if there is anything that you must have! Since they only display what is available in your size, there is none of the disappointment of finding a great deal just to discover they only have it in the smallest or largest size available!